Getting Started with Microsoft Report Builder
In this Article (Click to Jump to the Topic)
Permissions
Before getting started, make sure you have permissions to access and edit SQL Server Reporting Services. SSRS is accessed via a web browser, preferably Internet Explorer or Microsoft Edge.
The URL for SSRS is typically something like this: http://servername/reports
You will also need read, write, and execute (or full sysadmin) permissions in SQL Server Management Studio.
Using SQL Server Management Studio for the First Time
When using SSMS for the first time, it is recommended that you navigate to Tools > Options and:
-
Enable Line Numbers
-
Uncheck the box that says Prevent Saving Changes that Require Table Recreation


Create a Stored Procedure
Write a stored procedure to pull back the data set that you will use in your report. For a MinistryPlatform report, include parameters for DomainID, UserID, and PageID. These are required.
You may add additional parameters as needed for the report, such as SelectionID, ProgramID, StartDate, and EndDate.
Use a naming convention that matches existing report stored procedures so that you can easily find it later, such as:
-
report_page_description_my_church_name
-
report_my_church_name_page_description
You can clone an existing stored procedure and rename it. It is not recommended that you modify an existing stored procedure, as the updates can get overwritten with future software releases.

Using Microsoft Report Builder
Open Microsoft Report Builder. You can select Blank Report from the options shown.

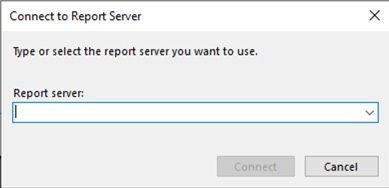
Connect to the report server by clicking the "Connect" link in the lower lefthand corner of Report Builder.

Once connected, you can add your data source. Right click on Add Data Source.

If you are properly connected to the report server, you may see your MPReportsDS data source listed. If so, click on it and click OK.

Now you can add your Datasets. Right click on Datasets and click Add Dataset.

Your Dataset is the stored procedure you wrote earlier. Give your dataset a name, select your Data source, select Query type of Stored Procedure, and select your stored procedure from the list.

Build Your Report
Now you are ready to begin building your report. Tables are popular ways to display information. You can click Insert > New Table at the top of Report Builder.

Click to drop your table in the white space, which represents your report.
Title and Execution Time are default fields in Report Builder. You may remove or change them if you would like.

You can drag fields from your dataset to the gray header boxes in your table. You can insert additional columns by right-clicking on the top gray area above your column headers.

Once you have your report looking the way you want, you can save it to your computer.
Publish Your Report
Now it's time to publish your report in SQL Server Reporting Services (SSRS). Open up a web browser, preferably Internet Explorer or Microsoft Edge, and navigate to SSRS.
You can upload the report anywhere, but it is recommended that you upload it to a custom folder or to the MP Reports folder. Simply click on the up arrow, then navigate to your saved report to upload it.

Find your report and right click the "..." at the top right, then select Manage.

Connect to a data source. Typically this will be the MPReportsDS data source.

Configure the parameters. Typically the DomainID, UserID, and PageID parameters will be hidden and pre-populated.
The DomainID will be your Domain GUID, which you can find in your Domain record in MinistryPlatform. You can use the UserID of a user who has the Administrator security role in MinistryPlatform, and you can use the PageID of the Contacts page if this report is not page-specific. It will not affect on which pages you can add the report in the platform.
You may use other reports for reference on how to configure the parameters for your report.

Add Your Report to MinistryPlatform
Create a report record in MinistryPlatform. Give the report a name; this doesn't have to be the same as what the report is named in SSRS. Define the file path, which will include the name of the report in SSRS.
*Note: It gets a little confusing because the name of the stored procedure usually doesn't match the SSRS report name or the name of the report as defined in the report record.

On the permitted pages sub-page, add the pages where you want the report to be available.

Finally, add the report to a security role. Oftentimes, it's fine to add it to the Basic Reports security role, but that is not absolutely necessary.

Congratulations! You successfully created and published a report.