Getting Started with SQL Server Management Studio
In this Article (Click to Jump to the Topic)
Permissions
You will need read and write permissions to create and edit tables, and you will need execute (or full sysadmin) permissions to create or edit stored procedures in SQL Server Management Studio.
Using SQL Server Management Studio for the First Time
When using SSMS for the first time, it is recommended that you navigate to Tools > Options and:
-
Enable Line Numbers
-
Uncheck the box that says Prevent Saving Changes that Require Table Recreation


Create a New Table
Navigate to MinistryPlatform, expand the database, then right click on Tables and select Add > New Table.

Configure the Primary Key
The first column in your table should be a unique identifier, an ID value that is unique. Best practice is to label it close to what your table name will be. For example Warehouse_People_ID for a Warehouse_People table. The data type should be int (short for integer) and you should not allow NULL values for this field.
Once you name your field, right click on it and choose Set Primary Key.

Once you do that, right click again and select Properties. The properties window may already be open.
Under Identity Column, click the white space and a drop-down arrow will appear. Select your identity column from the list.

Finish Creating Your Table
Continue adding fields to your table. These are some of the most commonly used data types.
int is an integer, or whole numbers
nvarchar(50) is any characters (letters and numbers) limited to 50 characters
date is a date value with no time
datetime is a date value with time
bit is a true/false field
money is currency

If you add a description under Column properties, your text will show up as a tooltip when you hover over the field when you are in MinistryPlatform. This can be helpful as a reference later on.

Domain ID
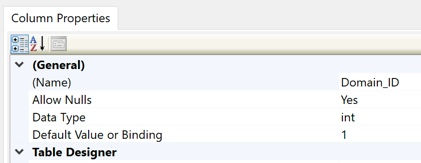
For every table you create, you need a field called Domain_ID. This can be the last field in the table, but it doesn't have to be. This field will not appear in the platform.
It's good practice to set the default value to 1.

Save Your Table
Click the floppy disk icon to save your table. Give it a name. The name should not contain any spaces.

Make Changes to a Table
To make changes to a table, right click on the table name and click Design. You can add fields to existing tables this way.

Create a Page Record for Your Table
You will likely need to click About > Clear Cache for MinistryPlatform to recognize the changes you made.

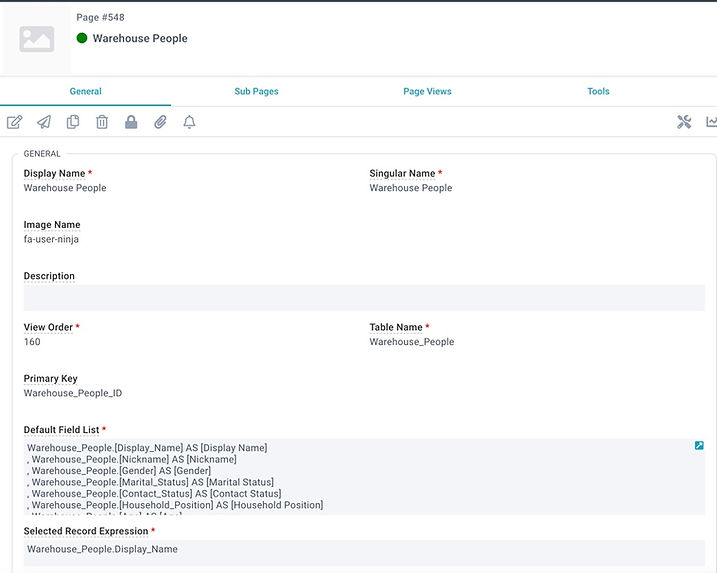
Create a new page record and fill out the appropriate fields.

Add any desired tools or reports to the page.

Create a page section page record for your new page. This will determine where the page will appear in the platform.

Finally, add page permissions to one or more security roles.
Congratulations! You have successfully created a table and corresponding page in MinistryPlatform.